..."Crochet Flower & Button"...defenitely match ! ..eNjoy !! ahaKs !
Sunday, 21 October 2012
Tuesday, 16 October 2012
Wednesday, 10 October 2012
When pRoduct is caLL...!
Ready to deliver ?
..wakahhkaaa....eRmmm...as usual I am bloggering...suddently...somebody make request for my products...ahhhaa...I told that I am bloggering but not selling anything here...she seeems dissappointed of my answer...then...because of pity...I made aLL these for her & friends...I charged friendly prices just to recover the cost...however...I am enjoy every steps in doing these...thanks !
Monday, 8 October 2012
Tutorials 9 - Fabric Hair Clipper
Step 1 - Measure and cut fabrics 4"inch x 6"inch and 2"inch x 2"inch each.
Step 2 - Fold fabrics, sew and cut into two pieces as well as the smaller piece(yellow fabric).
Step 3 - Make it as pictures shown and the smaller fabrics turn to main side looked.
Step 4 - Fold the fabrics and pin it well.
Step 5 - Fold fabrics one more times and you will get as pictures shown.
Step 6 - Join both fabrics.
Step 7 - Wrap the centre part with the smaller fabrics and sew well at bottom.
Step 8 - Apply glue only to bottom and centre part and stick to hair pin.
Samples - Fabrics Hair Pin
Note : This made might be used for any other accessories as well such as brooch etc.
Friday, 5 October 2012
Tutorials 8 - Fabric Flower Pin
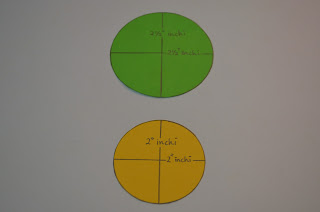
Step 1 - Measure, draw and cut two pieces of paper sizes 2" x 2" and 2.5" x 2.5".
Step 2 - Cut fabrics according to paper.
Step 3 - Knitt one round for each fabrics.
Step 4 - Put some fiber inside and fasten it by pulling the thread and tie it well.
Step 5 - Join it together by doing a well knitting.
Step 6 - Apply glue to bottom part and stick with the pin.
Samples - Fabrics Flower Pin
Note : Cotton fabrics is easy to made this but other fabrics is not impossibble too..let's try !
Wednesday, 3 October 2012
Tutorials 7 - A Bow
Part 2 of 2
Step 1 - Two pieces of fabrics sizes 6"inch x 5"inch each.
Step 2 - Sew upper and bottom parts each.
Step 3 - Turn fabrics to main side looked and fold it to centre as shown. Sew it well.
Step 4 - Join centre part of each other.
Step 5 - Fold again as pic shown by pulling centre part up and followed by both side to centre part.
Lock it and sew.
Step 6 - Make bow fasten(black fabric in the pic) by cutting 1 piece black fabric 4"inch x 24"inch and join it(sew). Turn it to main side looked. Do finishing at bottom of each side and you will get as pic shown.
Step 7 - Join bow fasten with upper part of the bag at centre point.
Step 8 - Make a simple sew on the bow to make a join on step 7 point and tie the bow with fastener nicely.
Samples - Bag with a bow
Note : This is the bag with accessories(a bow). I am sure it's looked better compare to Part 1 of 2 Bag(plain bag).
Tutorials 6 - Zebra Bag
Part 1 of 2
Step1 - Each pieces fabrics were 24" inch x 5"inch.
Step 2 - Joined the fabrics and have had a lining piece same size both.
Step 3 - Joined the lining as shown.
Step 4 - Joined each zebra part to centre part of black piece and sew.
Step 5 - Have had another two pieces of zebra fabrics for making bag holder sizes 23"inch x 3.5"inch each. Sew it well.
Step 6 - After bag holder were sew, join it to upper part of the bag as shown.
Step 7 - Zip 8"inch and two pieces zebra fabrics sizes 3"inch x length of zip.
Step 8 - Make it well as shown and sew fabrics with zip.
Step 9 - Join zipper part with upper part of the bag.
Step 10 - Join both side bag and make a plit at the sharp bottom part bag.
Step 11 - For better result, run a sew again at the upper part bag.
Samples - Bag
Note : This is a simple bag without any accessories. I will make it looked better in Part 2 of 2 continues from this tutorials.
Subscribe to:
Comments (Atom)


